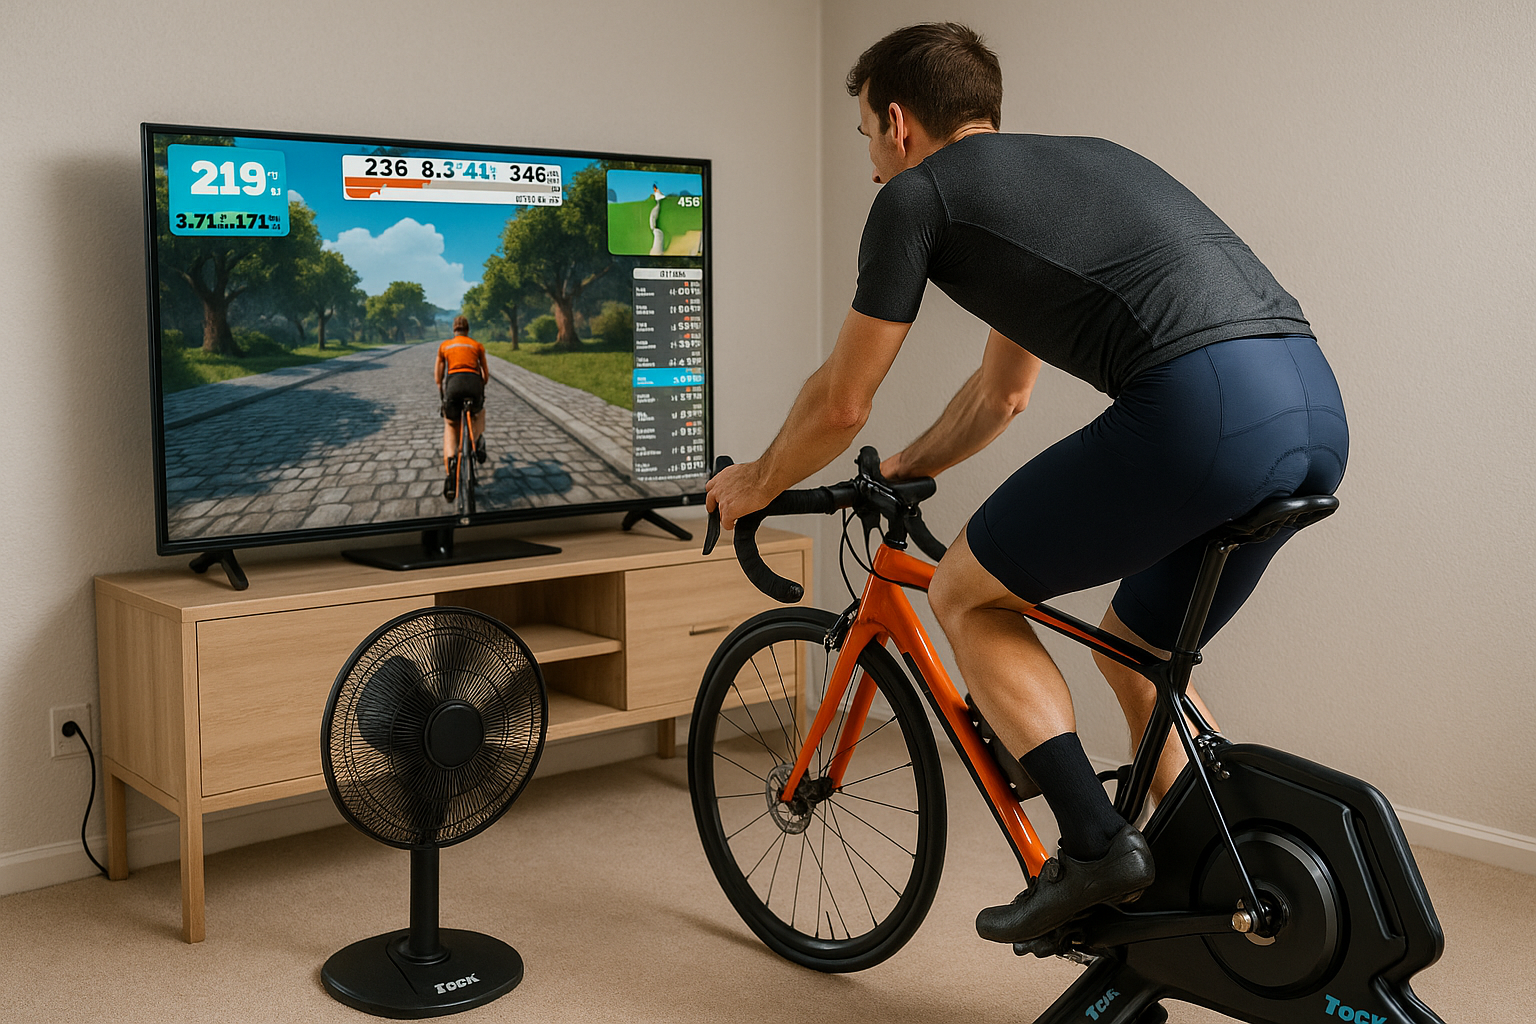
Every indoor cyclist knows the feeling.
You finally have an hour to jump on the trainer, start your favourite virtual route and turn the pedals. Two minutes later, a little voice appears behind you: “Can I ride too?”nIf you’re a parent, that’s usually the point where training either becomes a family activity—or doesn’t happen at all.
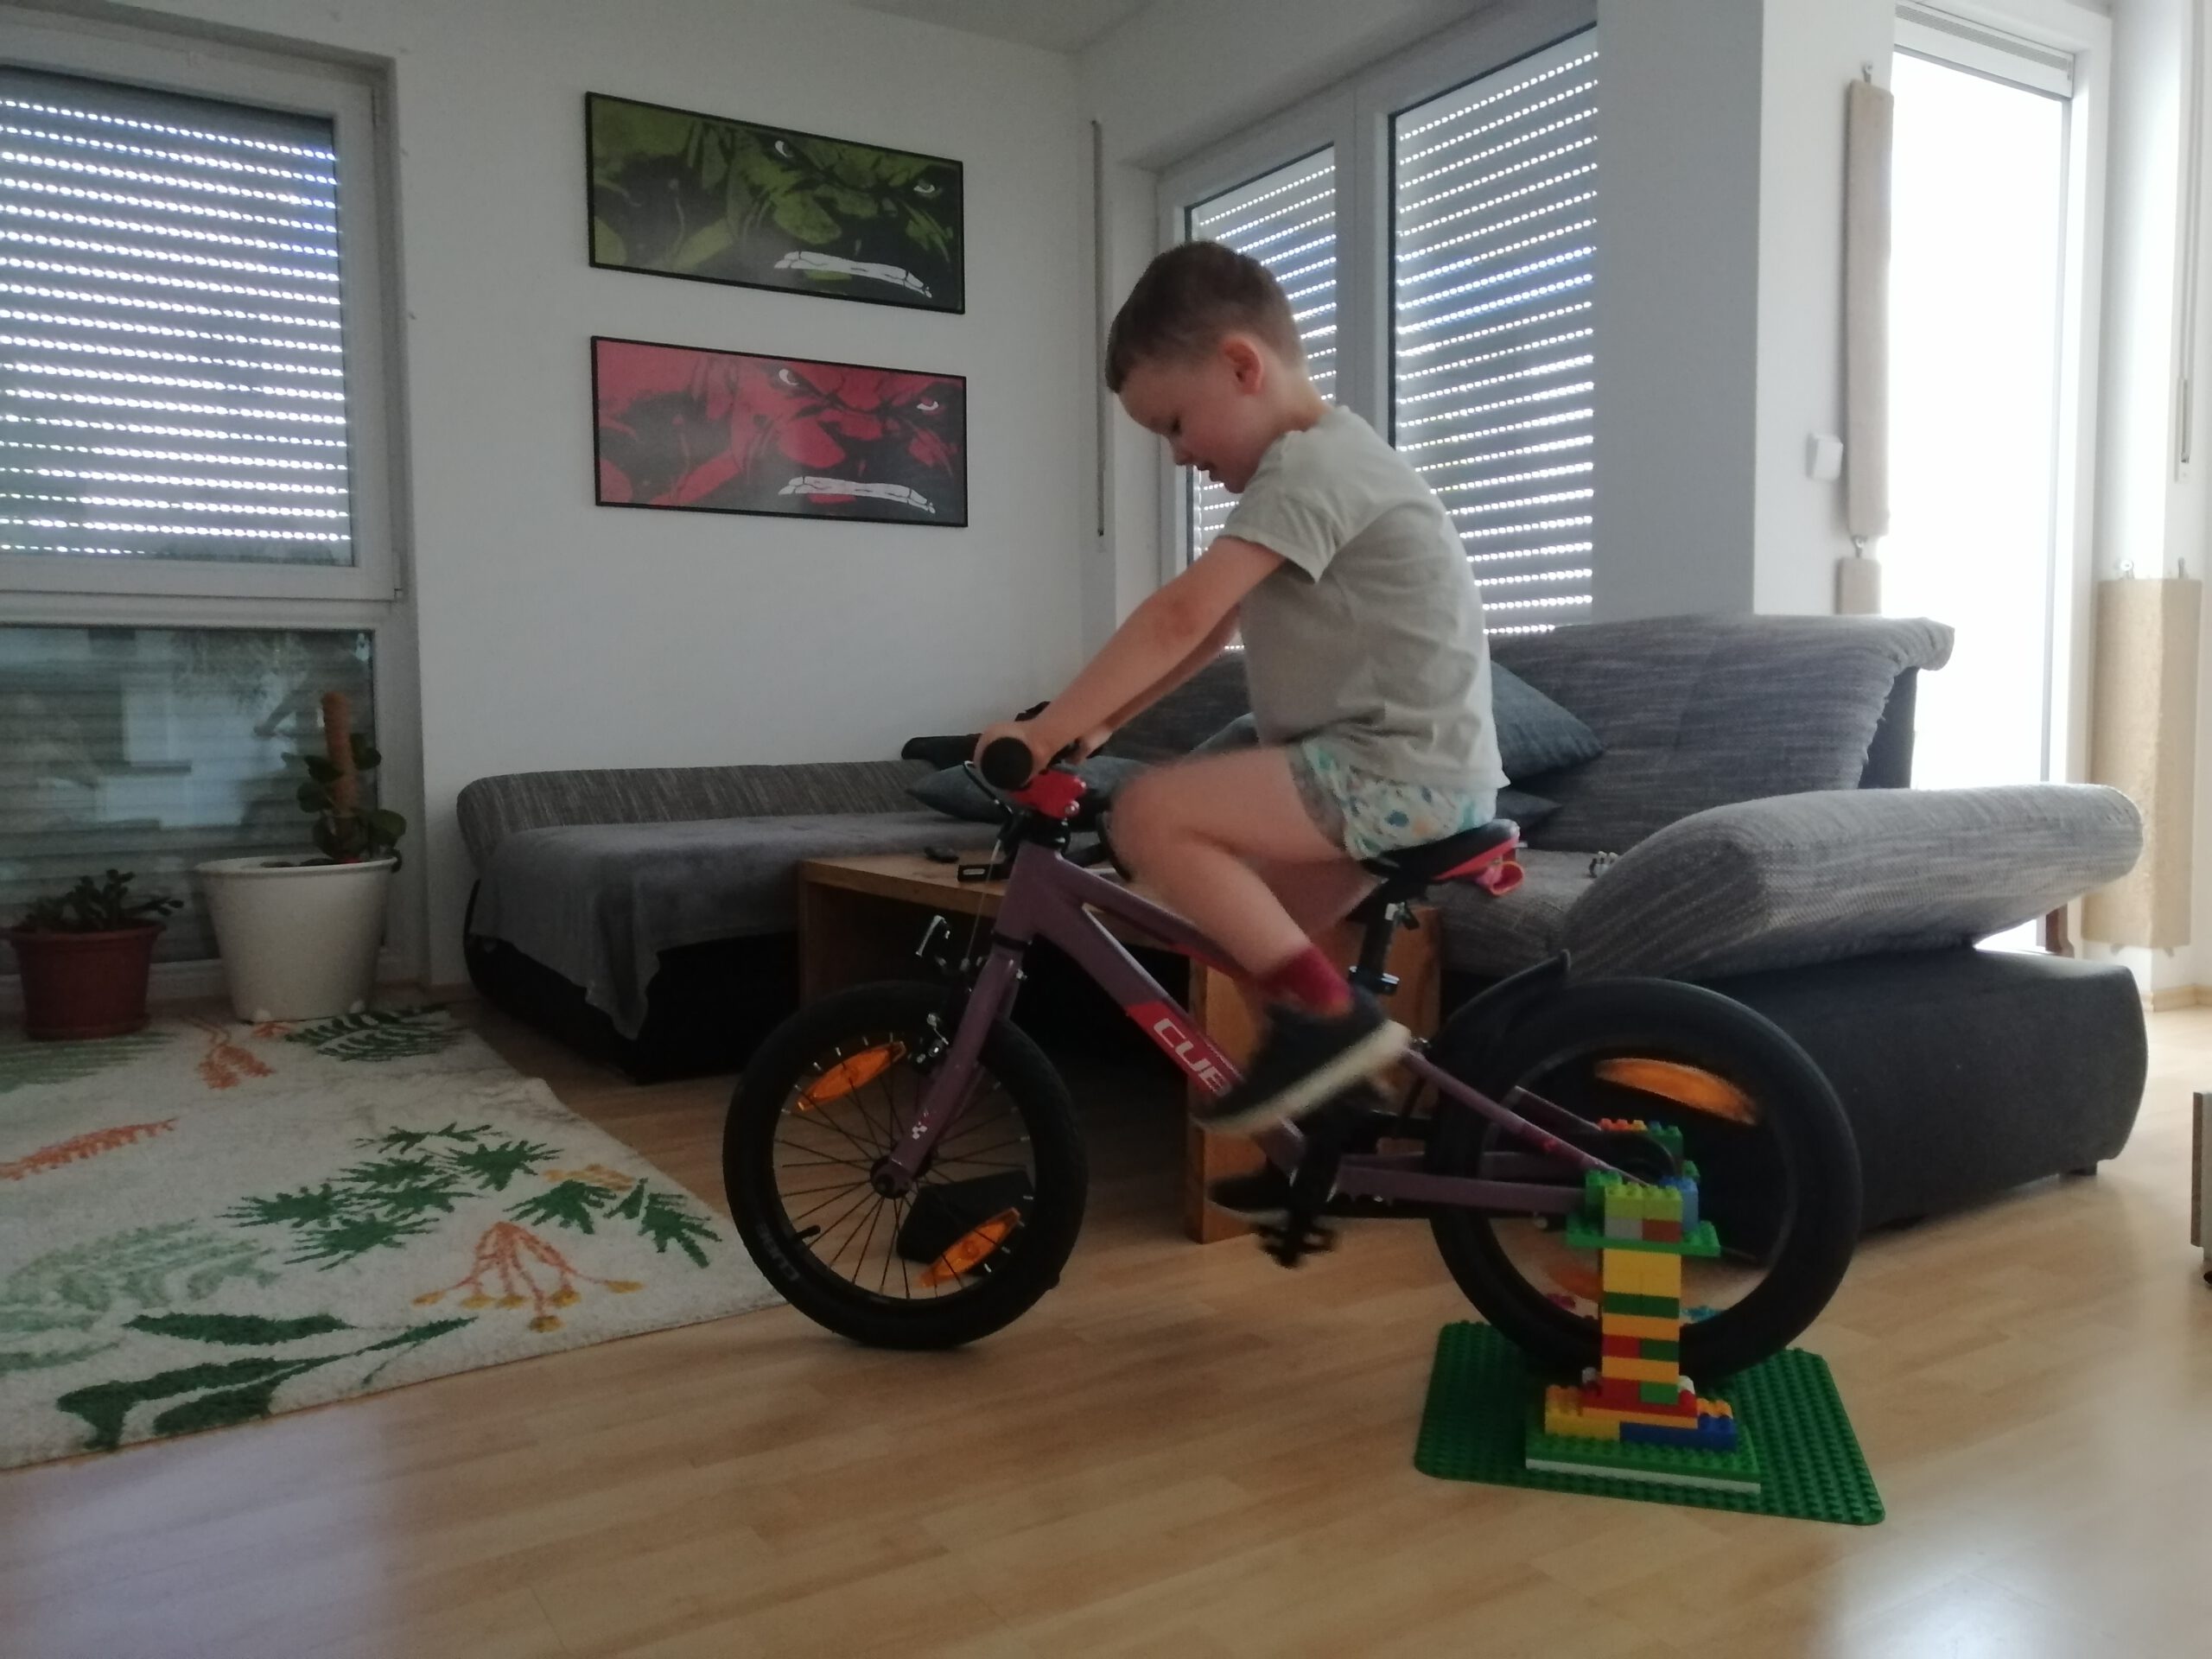
Over the past winters, we discovered a surprisingly simple solution. Instead of telling our son to wait, we built him a bike trainer of his own. Just from a box of DUPLO bricks.
It turned out to be one of those little family projects that are almost as much fun to build as they are to use. As an added bonus, it also helped him get comfortable with a new bike after making the jump from a balance bike to his first proper children’s bike.
Whether your child has just graduated from a balance bike or is still getting used to their very first pedal bike, riding indoors is a fun way to build confidence before heading back outside. Especially during the colder months, this DIY kids bike trainer became a great way to keep the excitement for cycling alive. Indoor cycling for kids suddenly became something we could enjoy together instead of taking turns.
Why build one in the first place?
Children’s bikes simply aren’t designed to fit conventional indoor trainers. Many don’t have gears, some use coaster brakes, axle standards differ, and most are simply too small for equipment built around adult bikes. Instead of trying to adapt something that was never designed for a 16-inch children’s bike, we built our own indoor bike trainer for kids. The solution turned out to be sitting in the toy box all along.
LEGO works in principle, but DUPLO bricks are much better suited. Their larger contact surfaces make the towers considerably more stable and easily support younger riders.
What you’ll need
• A large DUPLO baseplate
• Plenty of DUPLO bricks
• Two larger DUPLO plates for the tower tops
• A children’s bike (up to roughly 16 inches)
• A little patience—and probably a future engineer to help with the building.
The best part? Building the trainer almost took longer than the first indoor ride. Which, if you’ve ever built anything from DUPLO with a five-year-old, probably won’t surprise you.
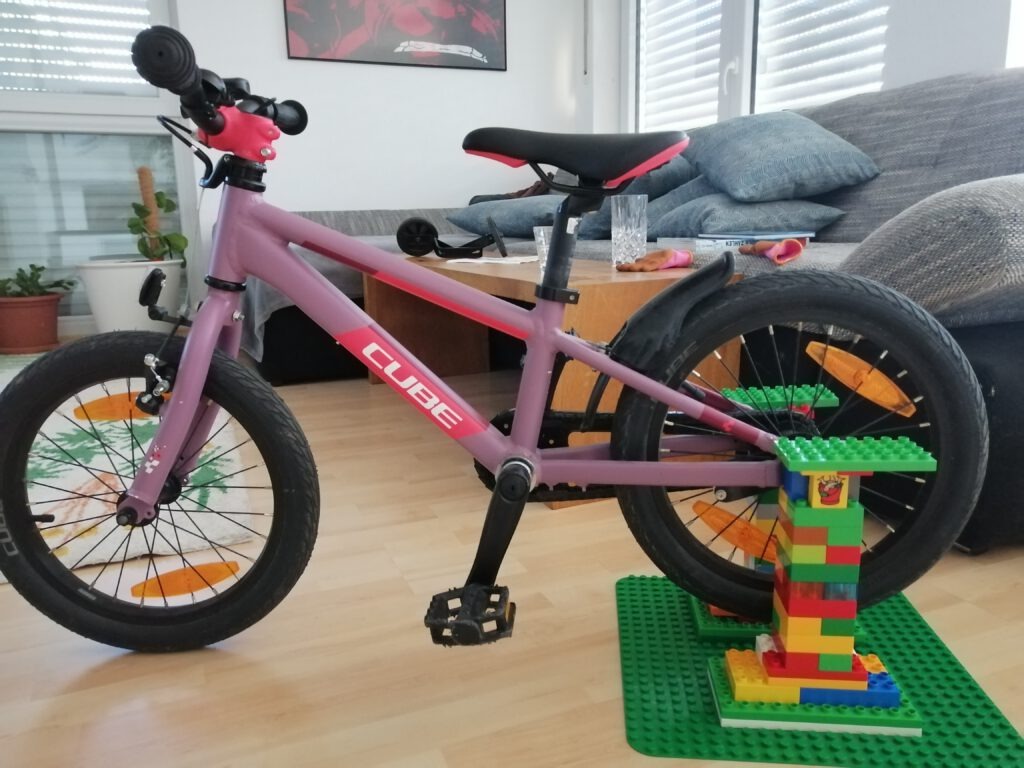
Before you start: Five things that make the trainer stable
• Build everything on one large DUPLO baseplate.
• Interlock every layer like brickwork.
• Keep the rear wheel only one or two finger widths above the floor.
• Make the towers wider rather than taller.
• Add a small lip around the rear dropouts so the axle cannot wander sideways while pedalling.
How to build your DIY kids bike trainer
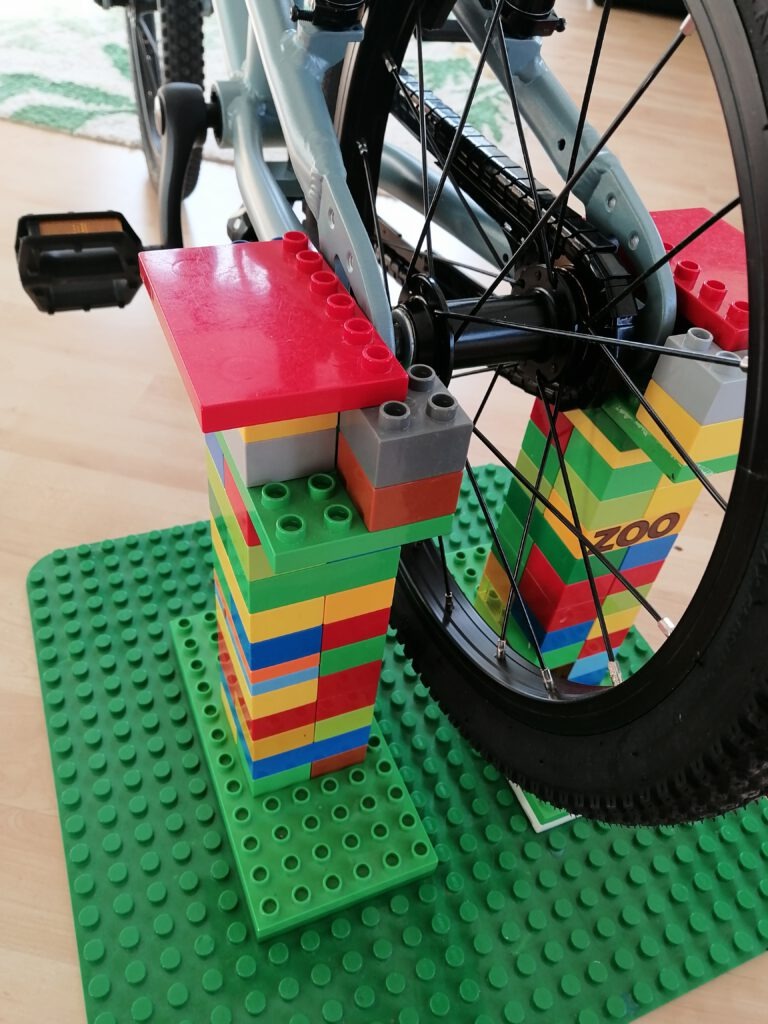
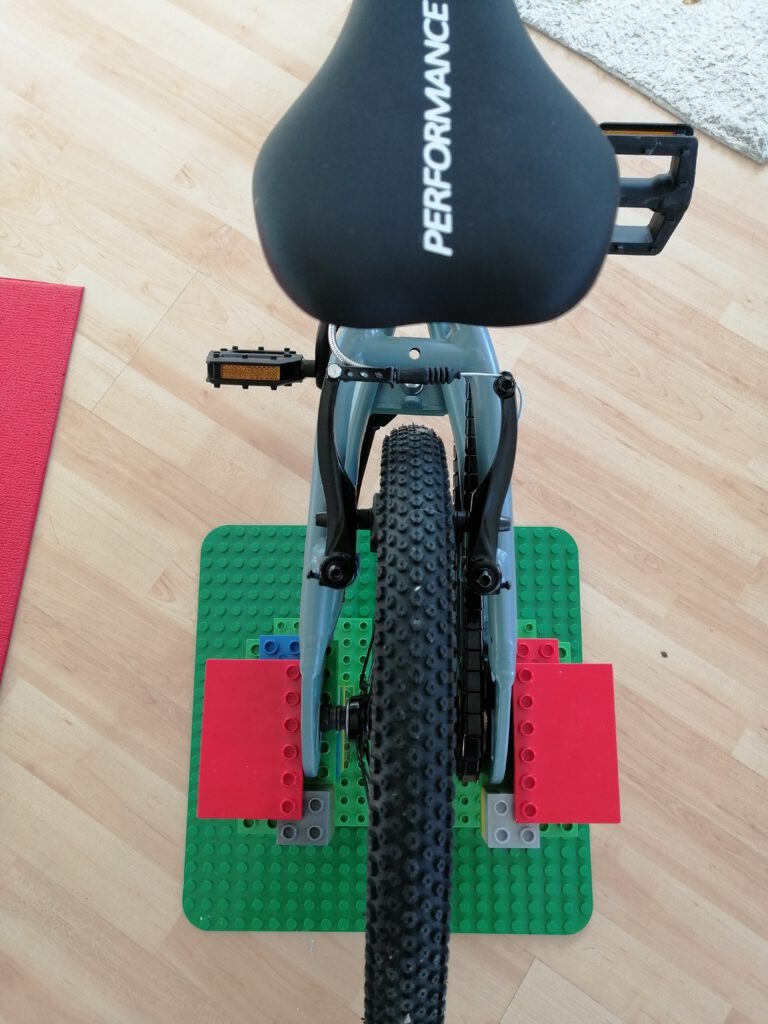
Start with a large DUPLO baseplate. It prevents the towers from moving apart and creates a stable foundation. Build two support towers underneath the rear axle and keep checking the spacing with the bike. Interlock the bricks instead of stacking simple columns. The overlapping pattern makes the towers remarkably rigid.
Aim for the rear tyre to sit only one or two finger widths above the floor. On top of each tower place a larger DUPLO plate. The bike’s rear dropouts rest on these flat surfaces while the rear wheel spins freely between the towers.
Finally, build a shallow border around each dropout support. This small detail keeps the axle centred and prevents the bike from slowly sliding sideways during pedalling.
A few lessons from our first rides
The first attempts weren’t completely drama-free. Once a tower collapsed because we had taken a shortcut while building it. Another time the rear axle slipped off one side.
That’s why an adult should always supervise the first rides, help the child onto the saddle and remind them that this isn’t a steering exercise. After only a few sessions our son had adapted completely, and riding indoors together became one of our favourite winter activities.
How big can the bike be?
In our experience this homemade kids bike trainer works reliably with children’s bikes up to 16 inches and around 20 kg (44 lbs). Beyond that the forces increase enough that the DUPLO towers eventually reach their limits.
Do you need a front wheel riser?
We tried building one from DUPLO, but it proved too slippery. A folded towel or blanket works much better—or simply leave the front wheel on the floor. Because the rear wheel is only raised slightly, a dedicated riser isn’t really necessary.
One final safety note
Use the trainer on a non-slip floor, supervise every ride, help children get on and off the bike and never leave young riders unattended. The goal isn’t to replace outdoor riding but to make winter cycling with kids fun, playful and confidence-building.
Frequently asked questions
Can I build this with LEGO instead of DUPLO?
Yes, but DUPLO is far more stable due to the larger bricks.
What size bike does it support?
Up to approximately a 16-inch bike and around 20 kg.
Can I use it with a balance bike?
Not really. It’s designed for children riding their first pedal bike.
Does the rear wheel touch a roller?
No. The bike is supported by the rear dropouts, allowing the wheel to spin freely.
Does my child need a helmet?
That’s a parental decision, but close supervision is much more important during the first rides.
- Difficulty: ★☆☆☆☆
- Build time: 20–30 minutes
- Cost: Free (if you already own DUPLO)
- Suitable for: Up to 16-inch bikes / approx. 20 kg rider weight
- Best for: First pedal bikes, winter cycling, indoor cycling for kids